Sunday 25 September 2016

Malvorosa take 3!

I have been lusting over this Victoria Beckham dress for a while now. But as it was made a good few years ago and carried a rather hefty price tag I decided that I would have a go myself.
I already had the Malvorosa pattern by Pauline Alice which I thought was a pretty good match. It even has the same pockets at the front. I have tried to hack this pattern before into a dropped hem dress but I wasn't very happy with the result. This time I decided to drop the hem on the back bodice piece and I'm far happier with how it has turned out.
I bought the fabric from Minerva Crafts. The quality it really nice but I was disappointed with the colour when it arrived. It was labelled as grey but the fabric is so dark that I feel it's more black than grey.
The skirt was tricky to gather onto the back bodice due to it being cut on the curve. On reflection I should have stay stitched it to stop it from stretching out of shape. The gathers definately have more of a bulge on the back rather than the neat gathers I wanted.
For the facings I used some fabric from an old Topshop dress I didn't like anymore. I love the black polka dots with the fabric.
To recreate the original hem on the dress I made a strip of HUGE bias binding from a piece of plain grey cotton. I really like the effect of it as it draws attention to the dropped hem.
Whilst it's not as luxurious as Victoria Beckham's dress I'm really pleased with how it has turned out. It will definitely get a lot of wear in the coming autumn months.

Happy stitching x

Sunday 11 September 2016

Swooning for Marylin...

When I saw Ralph Pink's Marylin pattern I absolutely loved it but it's very different to how I would usually dress. My wardrobe has definitely changed since I started sewing and I have more confidence to try new styles and step out of my confidence zone so I decided to go for it! Because I wasn't totally comfortable with having a huge amount of my stomach on show I lengthened the bodice by an inch and a half which also means that I used an extra button.

I made the two piece set using a linen and silk mix from the man outside Sainsbury's. I'm kicking myself for not buying more as it's completely gorgeous.

The cut of Ralph Pink's patterns are beautiful. I love how they are so different to other independent pattern brands. Just looking at his patterns makes me feel very inspired. His instructions however are sometimes quite sparse. Because of this, I always read through them first to check that I understand where I'm going! I made a few alterations; choosing not to top stitch the facing down, and also changing the order slightly when sewing the fly. I also finished the skirt pieces before sewing as there aren't any instructions as to when to finish the seams.

Fit wise I made no alterations to the skirt which is incredible for a pencil skirt! I made a few alterations to the top; shortening the straps, taking the side seams in by about one inch each side and slightly altering the shape of the darts so they aren't too pointy.

My machine didn't like the fabric and it snared it a few times when sewing the button holes. Luckily they unpicked easily and there aren't any holes.
I used plain blue buttons as I wanted them to blend into the fabric.
Overall I love my Marylin. I think that I will get much more wear out of the skirt with a different top. But for those special, warm days I will certainly have the courage to wear it as a two piece.

Happy stitching x

Saturday 3 September 2016

Emerson Crop Pants

I love culottes! I have a few RTW pairs which I live in when it starts to heat up. So I decided it was time to make some. After a lot of searching all I could find were culottes with pleats resulting in very large legs. I knew that I wanted something a bit more streamlined.

Lucky for me, True Bias released the Emerson pattern. As soon as I saw them, I knew that I wanted them!

I have a confession to make...I am a lazy sewer. I never make toiles. It's always a dangerous game to play and I have more than a fair few failures which probably could have been avoided. As they were trousers I decided that I would break with tradition and make a toile, and I'm glad that I did. I ended up adding 4cm to the crotch seam to enable them to sit a bit higher (and more comfortably) and I also added 3 inches to the length of the trousers.

I made the trousers in a wool rayon mix which has a really nice drape. I bought in on a recent trip to Walthamstow market. The construction was very straightforward and I didn't need to make any changes to the instructions or construction of the trousers.

I really like them and I think that the fabric means that they will transition nicely into my autumn wardrobe (I know, I can't believe it's that time of the year again either).
The only element of the trousers which I'm not sure about is the waistband which is gathered at the back. It may just be my fabric choice but it feels a bit bulky.
Any there any other culotte patterns out there which you recommend?

Happy sewing x

Wednesday 24 August 2016

Inari the incredible

Named clothing called this dress Inari which is a Japanese name meaning successful and I have to say that this dress is more than aptly named! I actually made it a few months ago bit it's spent most of its time either on my back or in the wash basket.

Whilst the end product is indeed successful, there was a bit of a journey to get there! A few months ago I bought a metre of gorgeous silk from Walthamstow market. I thought that I might be able to squeeze the Inari out of a metre and after tryin more than a few layouts I managed to squeeze it on. Triumphantly, I strutted upstairs to iron the fabric. After ironing I began cutting out only to realise that I had started using a layout which didn't work. I was fuming with myself. I was desperate for more of the fabric so I jumped on a train to the market but sadly they has sold out. I reluctantly settled for this piece of blue rayon instead. Luckily, I'm pleased with the dress which has got lots of wear and I have a growing love for the fabric!

The dress was a very quick sew with impeccably written instructions. It has a relaxed, baggy fit which made fitting very easy, I only took it in slightly a the bust.

Despite appearing very plain it has some beautiful details such as the dropped split hem and a cuff on the arms.

I have also since made a silk version which I wore to my friends wedding...
I hope you avoid any disasters similar to mine! Happy stitching x

Monday 8 August 2016

Evie La Luve Rosie

I'm currently a very lucky lady as it's the summer holidays! Because of this, I have been sewing up a storm which made me want to try a new skill. I turned to my underwear pattern stash and choose the Evie La Luve Rosie pattern.

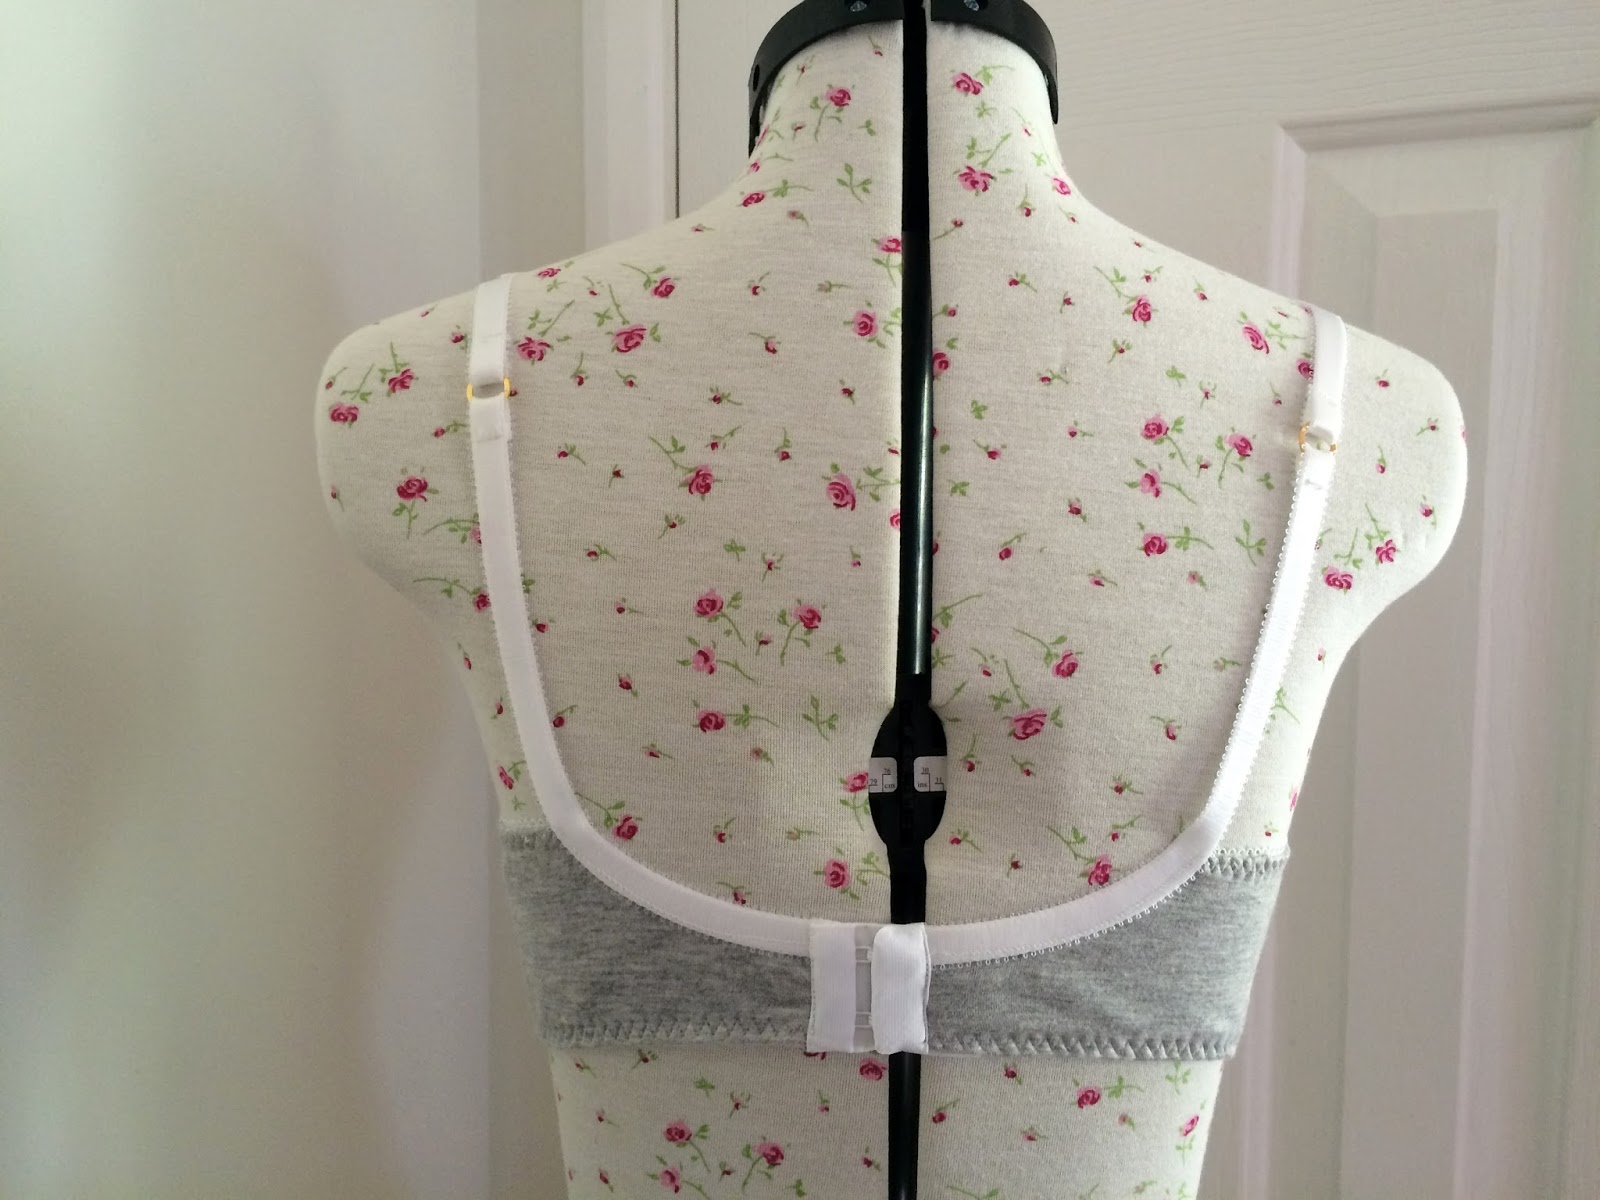
The language and seemingly endless list of supplies has always put me off sewing underwear but over time I have managed to pick up most supplies (apart from the strap elastic). I bought no new fabric, using all scraps from left over projects. Bra making is brilliant for using up jersey scraps. Because of this, the lining is rather an unusual colour for the bra!

The instructions were fabulously straightforward and I only came unstuck when trying to create the straps. However, after reading them out loud to a friend they became much clearer. I would definitely recommend the pattern for any bra beginners like myself.

There was something so gloriously satisfying about the whole project. With each step it seemed to change so much and develop as an item.

I love the back detail to this bra, with the straps coming out from the hook and eye.

The rather random mix of colours means that I have some funky thread on show on the inside but as it's my first bra it doesn't bother me too much.
Fit wise, it's pretty good. I made a novice error when cutting the elastic for the bottom band and didn't cut it small enough to provide a huge amount of support. So this is definitely something to bear in mind when making the next one. But it's beautifully comfortable to wear and it's so nice not to have under wiring digging into your ribs.

I'm keen to continue to develop my skills and sew another, are there any bra patterns you recommend?

Happy stitching x

Sunday 31 July 2016

No moaning about Moana...

I feel in love with Papercut Patterns Moana dress as soon as it was released. I'm not sure why it has taken me so long to get around to making it...but I'm very pleased that I finally did!

The pattern can be a top or dress and I must admit that I loved the top instantly but it took me a while to warm to it as a dress. It sat on my dress form as a dress for few weeks before I finally asked Instagram followers what they thought. Upon their advice I decided to keep it as a dress and see how it went. Since finishing it, it's had more than a few outings and I am so pleased I kept it as a dress!

I made the dress from a drapey rayon I bought on a trip to Walthamstow. It took just under 2m of fabric as a dress but I wasn't being especially economical with the cutting out so it could be possible to squeeze it out of less.

I made the dress in xxs sizing out to xs at the waist. The top was rather baggy at the bust to I took this in either side by about 2cm.

I love the peplum detail with the dropped waist. I was fearful of hemming the peplum and decided to use my rolled hem foot for the first time. After a few practises (and more than a few YouTube clips) I jumped in. The full circle made it more tricky but considering it was my first time using it I'm rather pleased with how it turned out.
Moana has an exposed zip detail at the back. The instructions recommend a metal one but I used a plastic one instead (I couldn't find a nice coloured metal one). Because of this I didn't feel the need to interface the facings which I'm pleased about as it keeps the dress relaxed and floaty. I always find exposed zips tricky and ended up having to do a little bit of hand sewing a the end.
Definitely pleased with this dress. I'm already dreaming of Liberty silk version...

Happy stitching x

Sunday 17 July 2016

As high as a lark

I LOVE this t-shirt! After me made may, I decided that I needed more me made tops so I purchased the Grainline Lark tee. It has been a faboulous addition already and comes with so many different variations.

The t-shirt sewed up exceptionally quickly. Taking only about an hour. Perfect for when sewing time is a bit squeezed!

I made the t-shirt using a metre of fabric. There's a bit left over which I'm hoping to squeeze some underwear from. This gorgeously colourful fabric is from girl charlee. It has a lovely drape to it which is perfect for this pattern.
I cut the top out separately rather than on the fold to make it easier to pattern match. I always find pattern matching tricky so I am pretty please with how the stripes matched.
The t-shirt pattern is very long. I shortened the pattern by about 4 inches and it's still this long! As I usually tuck my t-shirts in, it shouldn't be too much of a problem.

Because I loved the t-shirt so much, I made another one straight away! This time using a striped jersey from Walthamstow Market.

I really liked the effect of cutting the neckline with the striped vertical on my first version so I did this again for my monochrome version.
I'm already planning a few plain versions which will make it easier to wear some of my patterned skirts!

Happy stitching x